|
| THE GRAPHIC CAN BE ENLARGED TO FIT 81/2 x 11 SIZE |
|
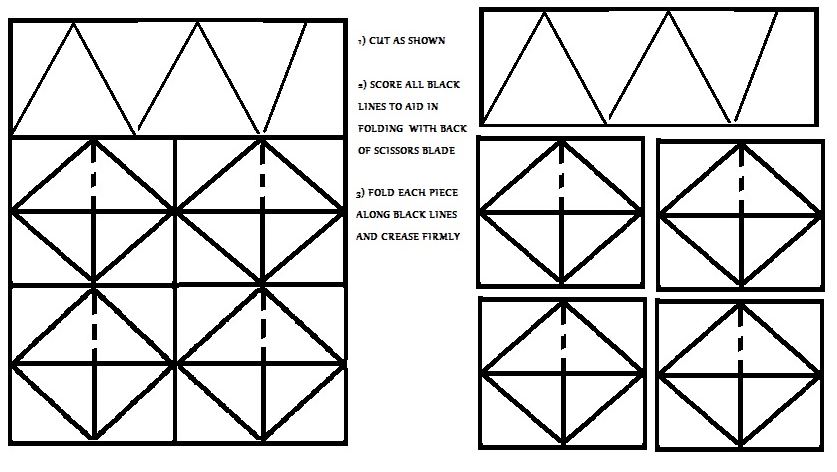
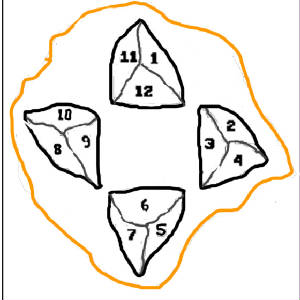
Cut the Top strip along the dotted lines as shown. This will leave a perfect square below it. This square
is then is then cut into four identical pieces, also squares, which can be folded to form four, three-sided, pyramidal
solid shapes as show below.
The top strip is creased and folded along the heavy black lines of the triangles. The last fold has the flap with
a tab to push through the slit on the other face. This holds the piece together. It will form a perfect
tetrahedron showing the cognitive content on four equalateral faces. USING THE BACK
OF THE SCISSORS BLADE, SCORE ALONG THE SOLID BLACK LINES INORDER TO FACILITATE EASY FOLDING.
As indicated below, cut narrow top piece off, then cut the remaining graphic into 4 equal squares as
shown:
.......................................................................................
|
| click here to see detailed directions for forming this Cube Shaped Periodic Chart |
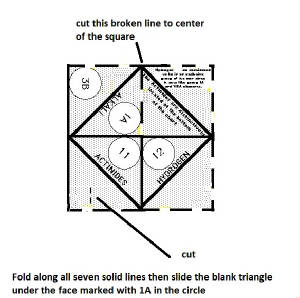
Score the black lines on each piece with the back if the scissors before folding. Fold each of the four pieces
along the heavy black square. Cut to the center of the square along the one leg of the diagonal cross which is marked
with the broken line. This will allow the students to slide the one flap under the other. When this is done, the piece
will become a 3-D pyramidal shape as shown above. To hold this shape, the corner of one flap, as marked with the
broken line, must be tucked into the slit cut into the flap under it. These marking for cutting are estimates and the
students ought first check by folding to see where the line should be cut so that the one edge will slide neatly into the
cut and hold the pyramid together. This is necessary since no glue is to be used. This allows the student to open
the pyramid and place the next slightly smaller pyramid from the next lesson inside.
|